
Introduction: Master the Art of Screen Capture Across Every Device
In our modern digital landscape, capturing what is on your screen is an indispensable skill. Whether you are documenting a software bug for tech support, archiving digital receipts, saving reference material for a work project, or simply sharing a hilarious meme with friends, taking a screenshot quickly and efficiently saves time and eliminates misunderstandings. However, with different operating systems evolving rapidly, keeping track of the precise key combinations and built-in utilities can be surprisingly confusing.
If you have ever asked yourself how to screenshot on windows, Mac, iPhone, or an Android phone without jumping through unnecessary hoops, you have come to the right place. This comprehensive, cross-platform guide covers every modern method—from classic hardware hotkeys to advanced hidden shortcuts and scrolling captures—ensuring you capture exactly what you need in seconds.
How to Screenshot on Windows: Every Shortcut and Tool Explained
Microsoft Windows offers several distinct methods to capture your screen, ranging from instant full-screen snapshots to precise area selections and advanced markup tools. Here is how to use every built-in method in Windows 10 and Windows 11.
1. The Universal Express Shortcut: Windows Key + Shift + S
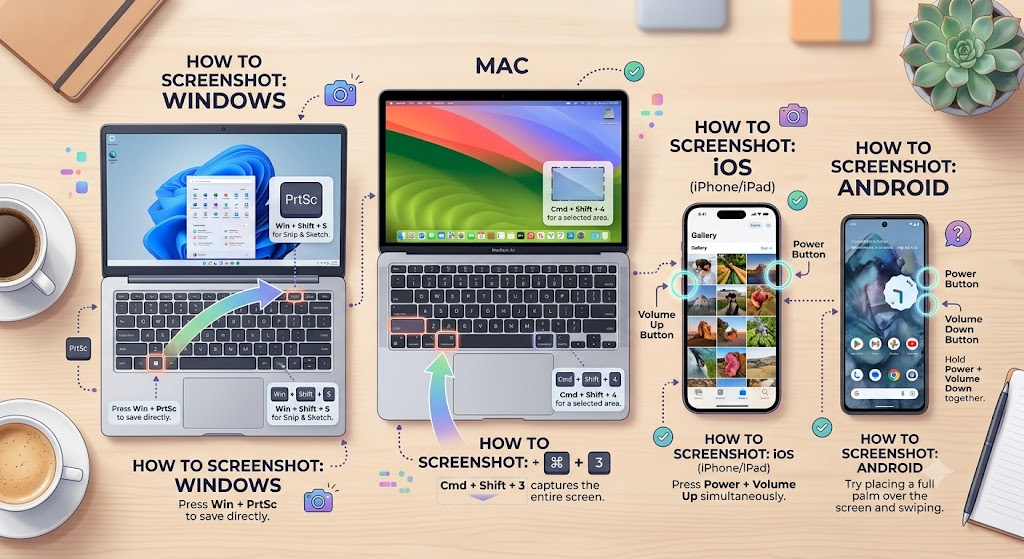
The absolute best everyday method to capture screen content on modern Windows PCs is the Snipping Tool hotkey combination. Pressing Windows Key + Shift + S immediately dims your display and invokes a modern screen capture toolbar at the top of your monitor.
- Rectangular Snip: Drag a cursor box around any precise element on screen.
- Freeform Snip: Draw an organic shape around complex objects or images.
- Window Snip: Hover over an open application window and click to capture only that window.
- Full-screen Snip: Instantly capture every pixel across all connected monitors.
Once you make a selection, the image is automatically copied to your clipboard. A notification toast appears in the bottom-right corner; clicking this toast opens the Snipping Tool editor where you can crop, annotate with highlighters, or save the image as a PNG or JPEG file.
2. The Classic Method: Print Screen (PrtScn) Key
Pressing the dedicated PrtScn (or Print Screen) key on your keyboard copies an image of your entire display straight to your clipboard. To view or save it, open an image-compatible application like Paint, Microsoft Word, or Slack, and press Ctrl + V to paste it.
Pro-Tip: In Windows 11, you can configure your settings so that tapping the PrtScn key automatically launches the modern Snipping Tool (Windows Key + Shift + S behavior). Navigate to Settings > Accessibility > Keyboard and toggle on Use the Print Screen button to open screen snipping.
3. Instant Save: Windows Key + Print Screen
When you need to capture a snapshot and immediately store it as a file without pasting it manually, press Windows Key + PrtScn. Your monitor will briefly flash dim to confirm the capture, and Windows will automatically save the full-screen image as a PNG file inside your Pictures > Screenshots directory.
4. Active Window Capture: Alt + Print Screen
If you only want to snapshot the single application window you are actively working in, press Alt + PrtScn. This copies an exact outline of the active window—excluding taskbars or background wallpaper—directly to your clipboard for instant pasting.
How to Screenshot on Mac: Key Combinations Demystified
Apple’s macOS features remarkably powerful screen capture shortcuts built right into the system kernel. Once you memorize these simple three-key and four-key combinations, you can capture full screens, selective regions, or specific open windows with pixel-perfect precision.
1. Full Screen Capture: Command + Shift + 3
Pressing Command (⌘) + Shift + 3 takes a snapshot of your entire desktop. If you use multiple displays, macOS generates separate high-resolution image files for each monitor simultaneously. By default, these image files save directly to your Desktop with time-stamped names.
2. Selective Area or Single Window: Command + Shift + 4
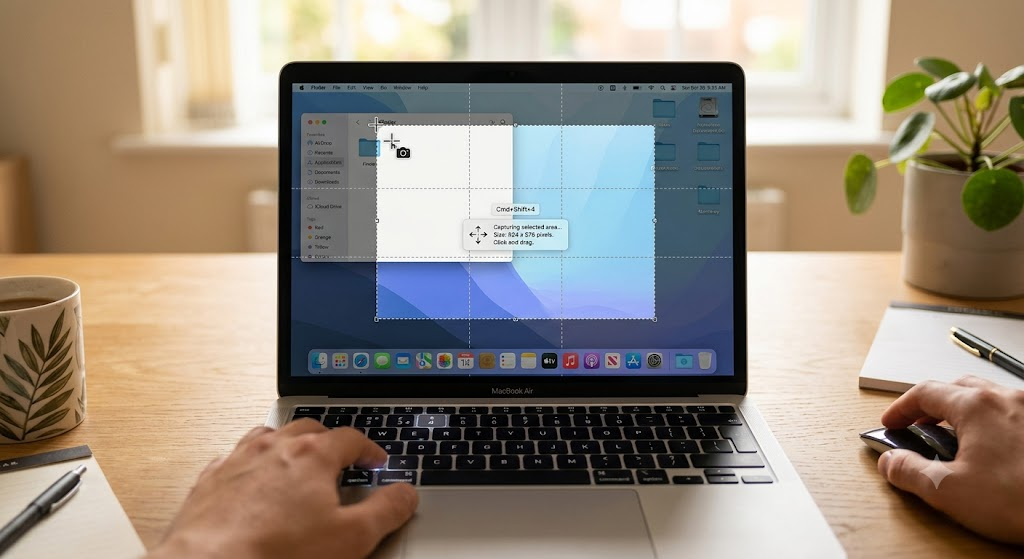
When you want to capture a specific section of your Mac screen, press Command (⌘) + Shift + 4. Your cursor transforms into a crosshair showing exact pixel coordinates.
- To select a region: Click and drag the crosshairs across the screen. Release the mouse button or trackpad to take the shot.
- To capture a single window: Press Spacebar after hitting Command + Shift + 4. The crosshair changes into a camera icon. Hover over any open window, menu bar, or dock icon, and click once to take a pristine capture with realistic drop-shadow effects.
3. The Screenshot Control Panel: Command + Shift + 5
Introduced in modern macOS versions, pressing Command (⌘) + Shift + 5 brings up a floating translucent control bar. This interface allows you to choose between full-screen snips, window snips, selection captures, and full screen recording options. Crucially, clicking Options inside this panel lets you change the default file save location (e.g., from Desktop to Documents or Clipboard) and set capture timers.
Taking Screenshots on iOS: iPhone and iPad Guide
Capturing your screen on mobile devices requires knowing which hardware buttons your specific model possesses. Here is how to screenshot across all generations of Apple iOS and iPadOS devices.
1. iPhones with Face ID (No Home Button)
On modern iPhones (iPhone X through iPhone 16 series), simultaneously press and release the Side Button (Power) and the Volume Up Button. You must press and release both buttons quickly; holding them down will trigger the power off / SOS emergency screen.
2. iPhones and iPads with a Home Button
If your device has a physical touch Home Button, press and quickly release the Top / Side Power Button and the Home Button simultaneously.
3. Taking Full Page / Scrolling Screenshots on iOS
Need to capture an entire web article or long document in Safari? Take a standard screenshot using your device hotkeys, then immediately tap the thumbnail preview that appears in the bottom-left corner of your screen. At the top of the markup screen, toggle the tab from Screen to Full Page. You can then scroll through the entire webpage and save it as a PDF document.
Taking Screenshots on Android Devices
While Android device manufacturers like Samsung, Google, and Motorola customize their user interfaces, the standard screen capture method remains unified across almost all hardware.
1. Universal Hardware Combination
On almost every modern Android phone or tablet, press and quickly hold the Power Button and Volume Down Button simultaneously for one second. The screen will flash, and a floating toolbar will appear at the bottom of your screen.
2. Scrolling Screenshots on Android
When capturing content in long apps (such as Twitter/X, Chrome, or messaging apps), take a standard screenshot. On the bottom popup bar, tap the Scroll Capture icon (two downward-pointing arrows). The system will automatically scroll down the screen, stitching the images together into one continuous vertical file.
3. Gesture Shortcuts (Samsung Palm Swipe & Pixel Quick Tap)
On Samsung Galaxy devices, you can take screenshots using palm gestures. Navigate to Settings > Advanced Features > Motions and Gestures, and enable Palm Swipe to Capture. Once enabled, simply swipe the edge of your hand horizontally across the screen.
On Google Pixel phones, navigate to Settings > System > Gestures > Quick Tap and assign a double-tap on the back of the phone to instantly snap a screenshot.
Pro Tips for Advanced Screenshot Workflows
To supercharge your productivity, consider integrating these advanced habits into your daily routine:
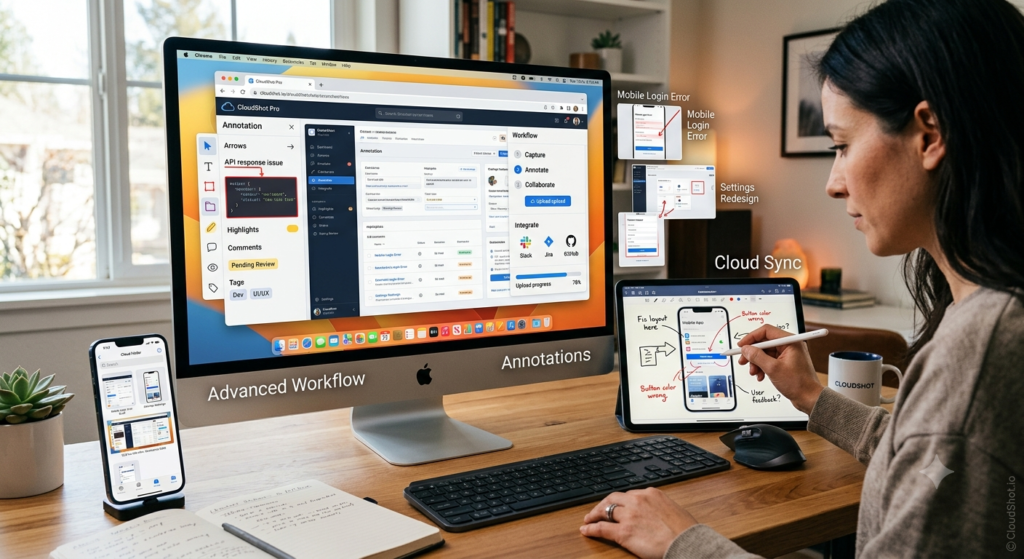
- Cloud Synchronization: Configure tools like OneDrive or Dropbox on desktop computers to automatically back up screenshots the moment they are taken.
- Clipboard Directing: On Mac, hold down the Control key while taking any screenshot shortcut (e.g., Ctrl + Cmd + Shift + 4) to copy the image directly to your clipboard instead of saving a desktop file.
- Third-Party Productivity Powerhouses: For ultra-fast documentation, advanced annotation arrows, and blurring sensitive data, consider tools like CleanShot X (macOS) or Snagit / Lightshot (Windows/Cross-Platform).
Conclusion
Now that you know exact methods for how to screenshot on windows, Mac, iOS, and Android, capturing and sharing information is easier than ever. Bookmark this guide for quick reference whenever you switch devices or step onto a new operating system!
Frequently Asked Questions (FAQs)
Where are my screenshots saved automatically on Windows 11?
If you press Windows Key + PrtScn, screenshots save automatically in your Pictures > Screenshots folder. If you use Windows Key + Shift + S, the snapshot is copied to your clipboard and temporary cache, which you can save manually via the Snipping Tool preview notification.
How do I take a screenshot on a Mac without using hotkeys?
You can launch the built-in Screenshot app using Launchpad or Spotlight search (Cmd + Spacebar, then type ‘Screenshot’). This opens an on-screen toolbar where you can click to take full, partial, or window screen captures.
Why is the PrtScn key not working on my Windows keyboard?
On many laptops, the PrtScn key shares functionality with function keys (F1-F12). Try pressing Fn + PrtScn or Fn + Windows Key + PrtScn. Also check if your keyboard has a physical Function Lock (Fn Lock) key turned on.
Can I take a scrolling screenshot of a full webpage on iPhone?
Yes. Take a normal screenshot in Safari, tap the preview thumbnail in the lower-left corner immediately, and select the ‘Full Page’ tab at the top of the screen before saving as a PDF.