
Taking a screenshot on a Mac is quick and easy once you know the right keyboard shortcut. Whether you want to capture your entire screen, a specific window, a selected area, or a Touch Bar, macOS includes built-in screenshot tools that require no additional software.
In this complete guide, you’ll learn how to screenshot on Mac, including the most useful Mac screenshot shortcuts, how to save screenshots, where screenshots are stored, how to copy a screenshot to the clipboard, how to record your screen, and how to troubleshoot screenshots that aren’t working.
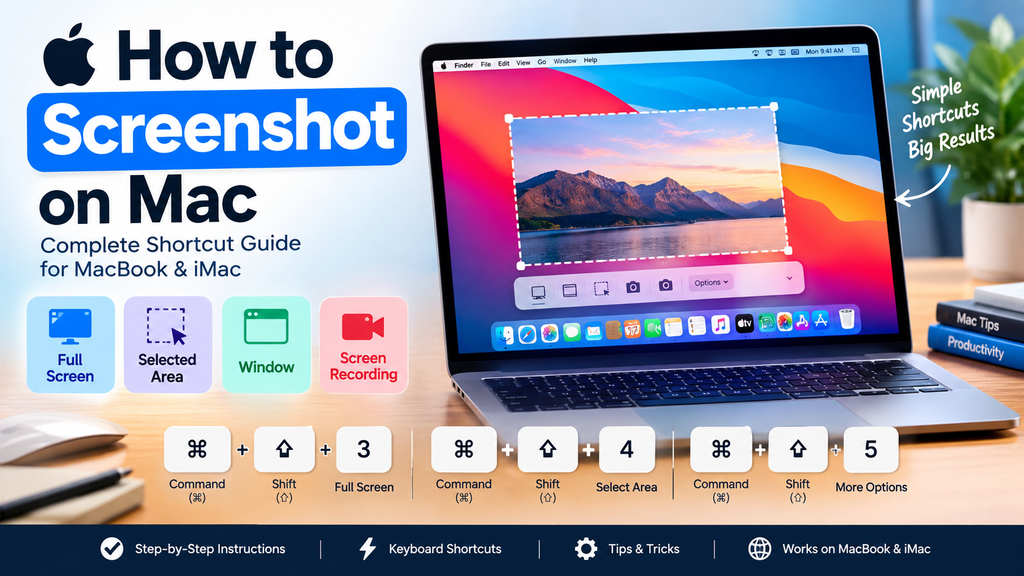
Quick answer: Press ⌘ Command + ⇧ Shift + 3 to capture the entire Mac screen. Press ⌘ Command + ⇧ Shift + 4 to select a specific area.
📸 Mac Screenshot Shortcuts at a Glance
| What you want to capture | Mac shortcut |
|---|---|
| 🖥️ Entire screen | ⌘ + ⇧ + 3 |
| ✂️ Selected area | ⌘ + ⇧ + 4 |
| 🪟 Specific window | ⌘ + ⇧ + 4, then Space |
| 🎛️ Screenshot toolbar | ⌘ + ⇧ + 5 |
| 📋 Save screenshot to clipboard | Hold Control with the shortcut |
| 🎥 Screen recording | ⌘ + ⇧ + 5 |
| 💻 Touch Bar | ⌘ + ⇧ + 6 on supported Macs |
🖥️ How to Screenshot the Entire Screen on Mac
If you want to capture everything currently visible on your Mac display, use the full-screen screenshot shortcut.
Keyboard shortcut
⌘ Command + ⇧ Shift + 3
Step-by-step
- Open the screen you want to capture.
- Press Command (⌘) + Shift (⇧) + 3 simultaneously.
- macOS captures the entire screen.
- The screenshot is normally saved automatically as an image file.
- Depending on your macOS settings, a thumbnail may temporarily appear on the screen.
- Click the thumbnail if you want to edit or mark up the screenshot.
💡 Example
If you are viewing a website and want to capture the complete desktop:
⌘ + ⇧ + 3 → Full screen captured
This method is useful for:
- 🖥️ Desktop screenshots
- 🌐 Website pages visible on screen
- 💻 App interfaces
- 📊 Presentations
- 🛠️ Error messages
- 📚 Tutorials
- 🧑💻 Software demonstrations
✂️ How to Screenshot a Selected Area on Mac
You don’t always need to capture your entire screen. macOS lets you select exactly which part of the screen you want to save.
Keyboard shortcut
⌘ Command + ⇧ Shift + 4
How it works
- Press Command + Shift + 4.
- Your pointer changes into a crosshair.
- Click and drag across the area you want to capture.
- Release the mouse or trackpad button.
- macOS captures the selected area.
🎯 Why use this shortcut?
It’s especially useful when you want to capture:
- A paragraph
- A photo
- A website section
- A particular application
- A chart
- An error message
- A button or interface element
- Part of a document
Cancel a selection
If you change your mind before releasing the mouse button, press Esc to cancel the screenshot selection.
🪟 How to Screenshot a Window on Mac
macOS can capture an individual application window without manually selecting its borders.
Keyboard shortcut
Press:
⌘ + ⇧ + 4
Then press:
Spacebar
Your pointer will change into a camera icon.
Steps
- Press Command + Shift + 4.
- Press Spacebar.
- Move the camera pointer over the window.
- Click the window.
- macOS captures the selected window.
This is particularly useful for creating clean tutorials, documentation, support instructions, and app screenshots.
🎛️ How to Use the Mac Screenshot Toolbar
If you want more screenshot options, use the built-in Screenshot application and toolbar.
Keyboard shortcut
⌘ Command + ⇧ Shift + 5
A screenshot control panel appears near the bottom of your screen.
Depending on your macOS version and available features, you can choose options such as:
📸 Capture Entire Screen
Captures everything visible on the display.
🪟 Capture Selected Window
Captures one application or window.
✂️ Capture Selected Portion
Lets you manually select a portion of the screen.
🎥 Record Entire Screen
Records your complete screen as a video.
🎥 Record Selected Portion
Records only the section you select.
🎥 How to Screen Record on Mac
You can also use macOS to record your screen without installing a separate screen recorder.
Shortcut
⌘ + ⇧ + 5
Then select one of the screen recording options.
To record the entire screen
- Press Command + Shift + 5.
- Select the Record Entire Screen option.
- Choose Record.
- Perform the actions you want to record.
- Stop the recording using the onscreen controls.
To record part of the screen
- Press Command + Shift + 5.
- Select Record Selected Portion.
- Drag the selection handles around the area you want.
- Start recording.
- Stop when finished.
Screen recording is useful for:
- 🎓 Online tutorials
- 🧑💻 Software demonstrations
- 🐛 Bug reports
- 📹 How-to videos
- 👨🏫 Teaching
- 🛠️ Technical support
📋 How to Copy a Mac Screenshot to the Clipboard
By default, a screenshot can be saved as an image file. But sometimes you don’t want to create a file—you simply want to paste the screenshot into another application.
You can add the Control key to many screenshot shortcuts.
Example
Instead of:
⌘ + ⇧ + 3
use:
Control + ⌘ + ⇧ + 3
The screenshot is copied to the clipboard instead of being saved in the normal screenshot location.
You can then paste it using:
⌘ + V
For example, you can paste the screenshot into:
- 💬 Messages
- 📝 Documents
- 🎨 Image editors
- 📊 Presentations
- 💻 Chat applications
📍 Where Are Screenshots Saved on Mac?
By default, screenshots are generally saved to the Desktop.
The filename typically includes the date and time of capture.
For example:
Screenshot 2026-09-23 at 11.42.15 PM.png
If you use the Screenshot toolbar, you can change the location where screenshots are saved.
Change the screenshot location
- Press ⌘ + ⇧ + 5.
- Click Options.
- Look under Save to.
- Select a location such as:
- Desktop
- Documents
- Clipboard
- Messages
- Other Location
This is helpful if you take many screenshots and don’t want your Desktop to become cluttered.
🖱️ How to Screenshot on Mac Without a Keyboard Shortcut
If you don’t want to use keyboard shortcuts, macOS provides the Screenshot application.
Open Screenshot
You can search for Screenshot using Spotlight or find it through your Mac’s applications.
The Screenshot interface provides options for:
- 📸 Entire screen
- 🪟 Selected window
- ✂️ Selected portion
- 🎥 Screen recording
This can be useful if you have difficulty remembering keyboard shortcuts.
💻 How to Screenshot on a MacBook
The same basic screenshot shortcuts work on MacBook models.
MacBook screenshot shortcuts
Entire screen
⌘ + ⇧ + 3
Selected area
⌘ + ⇧ + 4
Screenshot options
⌘ + ⇧ + 5
Selected window
⌘ + ⇧ + 4 → Space
You don’t need a separate screenshot application for normal captures.
🖥️ How to Screenshot on an iMac
On an iMac, the standard macOS screenshot shortcuts work the same way.
Full screen
⌘ + ⇧ + 3
Selected area
⌘ + ⇧ + 4
Screenshot toolbar
⌘ + ⇧ + 5
The same shortcuts can also be used with compatible Apple keyboards.
🖥️ How to Screenshot Multiple Monitors on Mac
If your Mac is connected to multiple displays, screenshot behavior can depend on the capture method and your display configuration.
For a full-screen capture, macOS can capture the display environment according to the screenshot mode being used.
For more control, press:
⌘ + ⇧ + 5
Then select the screenshot option you need.
If you only want a particular area, use:
⌘ + ⇧ + 4
and manually select the desired region.
✏️ How to Edit a Screenshot on Mac
After taking a screenshot, macOS can provide a temporary thumbnail that you can select to open editing and markup tools.
Depending on the available options, you can perform actions such as:
- ✏️ Draw
- ➡️ Add arrows
- 🔲 Add shapes
- 🔤 Add text
- 🔍 Highlight information
- ✂️ Crop
- 🖊️ Mark important areas
- 🔄 Rotate
This is useful when creating instructions or explaining something to another person.
Example
If you’re reporting a website problem, you can:
Screenshot → Mark the error → Add an arrow → Save → Send
⏱️ How to Take a Delayed Screenshot on Mac
The Screenshot toolbar includes options that can be useful when you need time to prepare the screen before the capture.
Press:
⌘ + ⇧ + 5
Then open Options and select an available timer.
A delayed screenshot can help when:
- A menu needs to be opened first
- You need to position the pointer
- A temporary notification must appear
- You need to prepare a particular application state
🖱️ How to Screenshot a Menu on Mac
To capture a menu:
- Open the menu you want to show.
- Press ⌘ + ⇧ + 4.
- Select the menu area.
- Release the mouse or trackpad.
You can also use the full-screen screenshot shortcut if you need the complete screen.
📋 How to Screenshot and Paste Directly
If you’re writing an email or message and don’t want to save a separate image file, use the Control modifier.
For example:
Control + ⌘ + ⇧ + 4
Then select the area.
After capturing it, switch to your destination application and press:
⌘ + V
This workflow is convenient for customer support, workplace communication, technical assistance, and messaging.
🖥️ How to Screenshot a Specific App on Mac
To capture only an application window:
⌘ + ⇧ + 4 → Space → Click the application window
This avoids manually dragging around the window and can produce a cleaner capture.
For example, you can capture:
- Safari 🌐
- Finder 📁
- Messages 💬
- Notes 📝
- System Settings ⚙️
- Other supported application windows
🔧 Mac Screenshot Not Working? Try These Fixes
If your screenshot shortcut isn’t working, try the following troubleshooting steps.
1. Check the keyboard shortcut
Open your Mac’s keyboard settings and verify that the screenshot shortcuts haven’t been changed or disabled.
2. Try the Screenshot toolbar
Press:
⌘ + ⇧ + 5
If the toolbar appears, use it to take the screenshot.
3. Check where screenshots are being saved
Your screenshot may have been captured successfully but saved somewhere other than the Desktop.
Open:
⌘ + ⇧ + 5 → Options
and check the selected destination.
4. Check available storage
If your Mac has very little free storage, saving new files can become problematic.
5. Restart your Mac
A restart can resolve temporary system or keyboard issues.
6. Check external keyboards
If you’re using a third-party keyboard, verify that the Command and Shift keys are functioning correctly.
⌨️ Complete Mac Screenshot Shortcut Cheat Sheet
Keep this table for quick reference.
| Action | Shortcut |
|---|---|
| 📸 Full screen | ⌘ + ⇧ + 3 |
| ✂️ Selected area | ⌘ + ⇧ + 4 |
| 🪟 Selected window | ⌘ + ⇧ + 4 → Space |
| 🎛️ Screenshot controls | ⌘ + ⇧ + 5 |
| 📋 Full screen to clipboard | Control + ⌘ + ⇧ + 3 |
| 📋 Selected area to clipboard | Control + ⌘ + ⇧ + 4 |
| 🎥 Screen recording | ⌘ + ⇧ + 5 |
| ❌ Cancel selection | Esc |
| 💻 Touch Bar capture | ⌘ + ⇧ + 6 on supported Macs |
🍎 What Do the Mac Keyboard Symbols Mean?
If you’re new to Mac, the keyboard symbols can initially look confusing.
| Symbol | Key |
|---|---|
| ⌘ | Command |
| ⇧ | Shift |
| ⌥ | Option / Alt |
| ⌃ | Control |
| ⎋ | Escape |
| ␣ | Space |
So when you see:
⌘ + ⇧ + 4
it means:
Command + Shift + 4
📱 Can You Screenshot on Mac With a Trackpad?
Yes. The screenshot itself is controlled by macOS rather than requiring a dedicated mouse.
You can use the trackpad to:
- Press ⌘ + ⇧ + 4.
- Click and hold the trackpad.
- Drag across the desired area.
- Release to capture.
A mouse works in essentially the same way.
🌐 How to Screenshot a Website on Mac
If you need to capture something visible on a website:
Method 1: Capture the visible screen
Press:
⌘ + ⇧ + 3
Method 2: Capture part of the webpage
Press:
⌘ + ⇧ + 4
Then select the desired area.
Important distinction
A normal Mac screenshot captures what is currently visible on your screen. It does not automatically capture an entire long webpage from top to bottom.
For a full webpage, you may need the browser’s own tools, a PDF export, or a dedicated full-page capture solution depending on the browser and your requirements.
📸 Mac Screenshot vs Screen Recording
| Feature | Screenshot | Screen Recording |
|---|---|---|
| 🖼️ Output | Image | Video |
| 📸 Captures | A moment | Activity over time |
| 🖥️ Full screen | Yes | Yes |
| ✂️ Selected area | Yes | Yes |
| 🎥 Video | No | Yes |
| 🛠️ Built into macOS | Yes | Yes |
| ⌨️ Main shortcut | ⌘ + ⇧ + 3/4 | ⌘ + ⇧ + 5 |
❓ Frequently Asked Questions
How do I screenshot on a Mac?
Press Command + Shift + 3 to capture the entire screen. For a selected area, press Command + Shift + 4.
What is the screenshot shortcut on Mac?
The main Mac screenshot shortcuts are ⌘ + Shift + 3, ⌘ + Shift + 4, and ⌘ + Shift + 5.
How do I screenshot part of my Mac screen?
Press Command + Shift + 4, then click and drag over the area you want to capture.
How do I screenshot a window on Mac?
Press Command + Shift + 4, press Spacebar, and then click the window.
Where does a Mac screenshot go?
Screenshots are normally saved to the Desktop unless you have changed the screenshot destination.
How do I copy a screenshot instead of saving it?
Hold Control while using the screenshot shortcut. You can then paste the captured image with Command + V.
How do I screen record on a Mac?
Press Command + Shift + 5 and choose one of the screen recording options.
Can I edit a screenshot on Mac?
Yes. macOS provides screenshot markup and editing options through the screenshot preview and related tools.
How do I screenshot without a keyboard?
Open the macOS Screenshot application and use its onscreen controls.
How do I screenshot only one window?
Press ⌘ + ⇧ + 4, press Spacebar, then click the window.
Why isn’t Command + Shift + 4 working?
Check your Mac’s keyboard shortcut settings, verify that the Command and Shift keys work correctly, and try opening the Screenshot toolbar with ⌘ + ⇧ + 5.
Can I take screenshots on a MacBook?
Yes. The standard macOS screenshot shortcuts work on MacBook computers.
Can I take screenshots on an iMac?
Yes. The same macOS screenshot shortcuts can be used on an iMac.
Can I screenshot a long webpage on Mac?
A standard screenshot captures the visible screen or selected region. A complete scrolling webpage generally requires a browser-specific feature or another full-page capture method.
🚀 Quickest Way to Screenshot on Mac
If you only remember three shortcuts, remember these:
🥇 Entire screen
⌘ + ⇧ + 3
✂️ Selected area
⌘ + ⇧ + 4
🎛️ More screenshot and recording options
⌘ + ⇧ + 5
These three shortcuts cover most everyday screenshot needs on a Mac.
💡 Mac Screenshot Tips
Tip 1: Learn Command + Shift + 4
This is one of the most useful shortcuts because you can select exactly what you want.
Tip 2: Use the Screenshot toolbar
Press ⌘ + ⇧ + 5 when you need more control over screenshots and screen recordings.
Tip 3: Use Control when you need to paste
Add Control to the screenshot shortcut when you want the capture available on the clipboard.
Tip 4: Keep screenshots organized
If you frequently take screenshots, change the save location from the Desktop to a dedicated folder.
Tip 5: Use markup for explanations
Add arrows, shapes, or text to screenshots when explaining an issue or creating a tutorial.
📝 Final Takeaway
Taking a screenshot on a Mac doesn’t require additional software.
For the fastest workflow, remember:
🖥️ Full screen → ⌘ + ⇧ + 3
✂️ Selected area → ⌘ + ⇧ + 4
🪟 Window → ⌘ + ⇧ + 4 → Space
🎛️ Screenshot & recording controls → ⌘ + ⇧ + 5
Once these shortcuts become familiar, you can capture, edit, copy, organize, and share screenshots on your Mac in just a few seconds.