
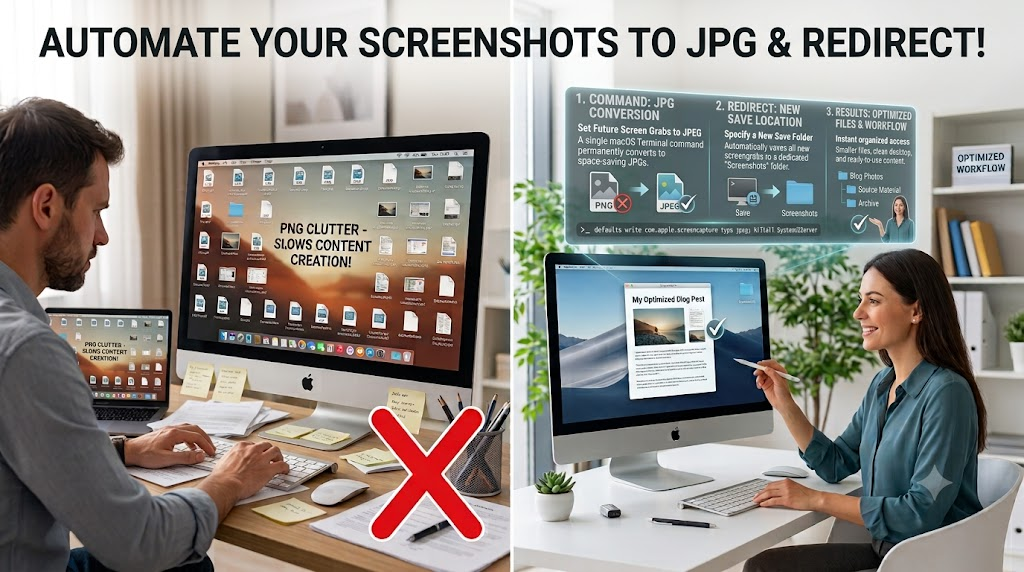
Is your Mac desktop cluttered with dozens of screenshot icons every single day? By default, macOS deposits every screen capture directly onto your desktop as a high-resolution PNG file. While PNG files offer lossless visual clarity, they also consume significant disk space and quickly turn your clean digital workspace into chaos. Learning how to Change Default Mac Screenshot Save Location and File Format is one of the most effective ways to instantly declutter your Mac and optimize file sizes.
In this comprehensive guide, we will walk you step-by-step through customizing your screen capture settings on macOS Sequoia, Sonoma, Ventura, and earlier versions. Whether you prefer a quick graphical interface (GUI) adjustment or a powerful Terminal command line tweak, you will gain full control over where your screenshots land and what format they take. If you frequently switch operating systems, you might also find our guide on macOS vs Windows screenshot shortcut comparison helpful for streamlining your productivity.

Why macOS Defaults to Desktop PNGs (And Why You Should Change It)
Apple engineered macOS to prioritize raw image quality right out of the box. PNG (Portable Network Graphics) is a lossless file format, meaning it preserves crisp text, sharp UI borders, and exact color fidelity without compression artifacts. However, this high level of quality comes with distinct tradeoffs that can slow down your daily workflow.
The Downside of PNG Files for Daily Screenshots
While PNGs look pixel-perfect, they are rarely necessary for standard screen grabs, bug reports, social media posts, or casual sharing. Here is why default PNG settings can hinder your user experience:
- Massive File Sizes: A full 4K or Retina display PNG screenshot can easily range from 5 MB to over 15 MB in size. In contrast, an equivalent JPG image usually takes up less than 1 MB without noticeable quality loss.
- Email & Messaging Limits: Sending multiple heavy PNG screenshots via email or Slack quickly eats into attachment bandwidth and causes delivery delays.
- Web Upload Inefficiencies: Heavy PNG images uploaded to blogs or web tools reduce page load speeds. Understanding the JPEG image compression standard helps explain why converting screenshots to JPG saves precious bandwidth.
The Problem with Desktop Clutter
Every time you press Command + Shift + 3 or Command + Shift + 4, your Mac creates a new item on your desktop. Over time, your screen becomes overcrowded with filenames like “Screenshot 2026-03-31 at 10.15.22 AM.png”. This visual noise reduces mental focus and forces you to spend extra time searching for actual desktop documents.

Method 1: Change Default Mac Screenshot Save Location via the GUI Menu
The easiest method to redirect where your screenshots are saved uses built-in tools without touching the command line. Introduced in macOS Mojave and available in all modern versions (including macOS Sonoma and Sequoia), the Screenshot Utility offers a clean graphical menu.
Step 1: Open the Native Screenshot Toolbar
To launch the interactive screenshot utility, press the following keyboard shortcut simultaneously:
Command + Shift + 5
A floating control toolbar will immediately appear at the bottom of your screen, featuring options for capturing the entire screen, selected windows, or chosen portions of your display.
Step 2: Access the Screenshot Options Menu
Click on the Options menu button located on the toolbar. A pop-up context menu will display several settings grouped into logical sections.
Step 3: Select or Create a Custom Save Folder
Under the Save to heading, you will see default locations such as Desktop, Documents, Clipboard, Mail, Messages, or Preview. To set a custom destination:
- Click on Other Location… at the bottom of the list.
- A Finder window will pop open. Navigate to where you want your screen captures stored (e.g., your Pictures directory).
- Click New Folder in the lower-left corner, name it
ScreenshotsorCaptures, and click Create. - With your new folder highlighted, click Choose.
From this point forward, every screen capture you take will automatically route directly into your designated custom folder, leaving your desktop completely pristine!
Method 2: Change Default Mac Screenshot Save Location Using macOS Terminal
While the GUI tool is convenient, power users, developers, and system administrators often prefer using macOS Terminal commands. Terminal provides faster execution, scriptability, and deeper customization options across older and newer Mac machines alike.
Step 1: Launch the Terminal Application
Open Terminal on your Mac using one of these quick methods:
- Press
Command + Spaceto open Spotlight, type Terminal, and press Enter. - Or open Finder, navigate to Applications > Utilities, and double-click Terminal.
Step 2: Enter the Location Change Command
In the Terminal prompt, enter the defaults write command target for the screencapture system service. The basic command structure looks like this:
defaults write com.apple.screencapture location /path/to/your/folder
Pro-Tip: You do not need to manually type out long file paths! Simply type defaults write com.apple.screencapture location (ensuring there is a space after
Frequently Asked Questions (FAQs)
How do I change the default Mac screenshot format back to PNG?
To restore PNG as your default file type, open Terminal and run the command: ‘defaults write com.apple.screencapture type png’ followed by ‘killall SystemUIServer’. Your Mac will immediately revert to saving screen grabs in high-quality PNG format.
Does changing the screenshot file format to JPG affect image quality?
JPG uses lossy compression, which significantly reduces file size. While there is a minor loss in pixel fidelity compared to PNG, standard web browsing, text readability, and UI elements remain virtually identical to the naked eye while saving up to 80% in file size.
Can I save Mac screenshots directly to cloud storage like Dropbox or iCloud Drive?
Yes! You can set your default screenshot save location to any folder located inside iCloud Drive, Google Drive, OneDrive, or Dropbox. Simply choose that cloud folder using Command + Shift + 5 > Options > Other Location, or set its path via Terminal.
Why didn’t my Terminal screenshot command take effect immediately?
Terminal changes to system preferences often require restarting the system UI server. Make sure you run the restart command ‘killall SystemUIServer’ in Terminal right after entering your defaults write command.
1 thought on “Change Default Mac Screenshot Save Location and File Format”
Comments are closed.